Difficulty: BASIC
Unity3D’s built-in scrollview by default won’t resize to fit the UI you place inside it – which isn’t very useful. A lot of people end up writing a script to make this work, but we’ll cover easier ways that don’t require code and are quick to do. Firstly, the fully automatic approach, and then a GUI-only approach that allows more customization.
This post assumes you’ve already downloaded Flexbox4Unity from the AssetStore, either the full version or the free demo.
Create a pre-configured, auto-sizing, UIScrollview with Flexbox
Requires: Flexbox4Unity full version.
The full version has several built-in templates to make it faster to build UnityUIs. One of them pre-builds a UIScrollview for you, with CSS Flexbox pre-enabled and configured:

After creating the Scrollview, resize it to your desired size/shape using the standard UnityUI controls:
- Select the Scene View
- Press the ‘t’ key to switch to UnityUI mode
- Drag the four white triangles to set resizing behaviour (usually: drag them to the four outer corners)
- Drag the blue corner docs to set the initial size / fraction of resize area to use
Here’s a video showing an auto-configured scrollview built by Flexbox automatically:
Alternatively, if you want more fine-grained control – or if you only have the Free version of Flexbox – scroll down to the section “Detailed custom setup for auto-sizing UIScrollview with Flexbox” below.
The next section explains the options you have for different “expand to fit” behaviours, all of which are automatic after you’ve selected them.
Different ways to control scrolling with Flexbox
Unlike UnityUI, Flexbox gives you much more control and power over the scroll behaviour and size of your UI elements. There are three common ways to tell Unity how much you want the UI to scroll.
First of all, make sure that your Flexbox UI is oriented the same way as your scrollbar. If you want vertical scrolling, select the Viewport object (find this in Hierarchy view: it is a grandchild of your new Scrollview), and set the FlexContainer’s layout-direction to “COLUMN”.
If you want horizontal scrolling, select the Viewport and set the layout-direction to “ROW”.
Option 1: Automatic sizing (recommended)
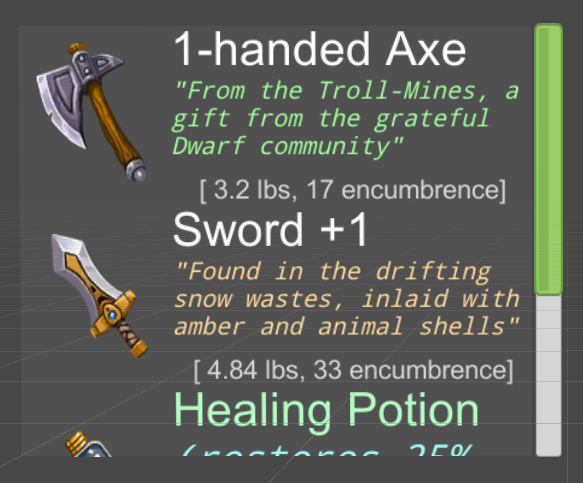
Flexbox has built-in automatic sizing of objects (this is one of the main features missing from UnityUI – if you hate the Unity ContentSizeFitter, and the way it frequently fails to size things or sizes them wrongly, this is for you :)).
In the Hierarchy view, open your new Scrollview object and find the Content-Holder grandchild. Select your Content-Holder and set the FlexItem’s basis to: “CONTENT”. This tells Flexbox to automagically work out how large the UI item needs to be to fully hold all its children, grandchildren, etc – and to set itself to that size. (This is what Unity’s ContentSizeFitter aims to do but often fails).
Option 2: Explicit sizing (useful for fixed UIs)
Flexbox also allows specific control of height and width. Select the Content-Holder as above, and set the FlexItem’s basis to “LENGTH”. The number is measured in pixels – give it a number say 500.
Option 3: Minimum and maximum sizes (combine with Option1 or Option2)
Unlike UnityUI, Flexbox has the built-in feature that all UI elements can be given a maximum size and/or a minimum size. This can be extremely useful for scrollviews, especially when creating complex layouts (where you want the rows in the scrollview to grow to fill the space when there’s few of them, but to shrink to fit as many as possible when there are many of them).
Select the Content/Content-Holder as above, and in the FlexItem set the “minimum width” / “minimum height” as desired.
Detailed custom setup for auto-sizing UIScrollview with Flexbox
Alternatively, you can set up the components for a Flexbox Scrollview by hand (no code required). This works with both the free version and the full version.
There are four parts to the manual setup, which is required by Unity (this is the way they designed their Scrollview component), and a small fifth step that enables Flexbox on the result.
Step 1 : Create a UnityUI object to show Unity where the Scrollview is, and how large
Select your Canvas, or one of your UI objects, in the Hierarchy View, right click, and “Create Empty”. A good name for this object is “Scrollview”.
This object will control where the scrollview sits in the overall UI, and control how it resizes when the main screen/UI resizes. In the Scene view, use the UnityUI mode (click in Scene view, then press ‘t’) to size the object, and set its resize behaviour.
It requires only one Component: Select the new object and from the Component menu select: Component > UI > ScrollRect
Step 2: Add a Scrollbar
Recommended: right-click on the first object you created, and select “UI > Scrollbar” to auto-generate a default Scrollbar.
Alternatively: Create a child of the first object you created, and add two Components:
- Image (this will be the gutter-image for the Scrollbar)
- Scrollbar (this will contain the Unity scrolling settings)
If you created it manually, there are several items you need to configure on the Scrollbar itself: you have to create a child SlidingArea, and a grandchild Handle. You need to choose appropriate images for each of these, and set up the sizing and resizing behaviour for each.
Whichever approach you take, you’ll need to size the main Scrollbar object by hand (Unity doesn’t do this automatically):
Position the new Scrollbar object in Scene view as before, using the UnityUI controls for size/position.
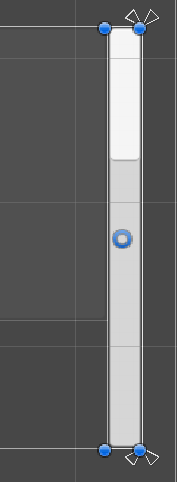
For a vertical scrollbar, the typical setup looks like the image on the right.
Note how the resize behaviour (white triangles) are configured so that it will resize to match the height of the parent object, but will never resize the width.
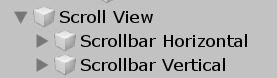
If you want a horizontal scrollbar as well as a vertical scrollbar, repeat this process so that you have two scrollbars as children of your first object, like this:
Finally, select your original object (the one with the ScrollRect component), and drag/drop your scrollbar object(s) into the field(s) “Horizontal Scrollbar” and/or “Vertical Scrollbar”.
Step 3: Create a Viewport
The ViewPort is confusing; it’s a Unity feature that is almost never used – in any games or apps – but forces us to do an extra step when creating scrollviews.
Create a child of your first object as before, and give it the following components:
- Image (this will be the background Image for your scrolling area). Note: this is REQUIRED even if you don’t want a background image
- Mask (this is what hides the parts that are scrolled off the edge)
- Flex Container (not required, but makes Step 4 easier/cleaner)
If you don’t want a background Image, you have to add one anyway, and then make it invisible. Do not disable it! This will break Unity’s internal scrolling system. Instead, to hide it, make sure the “Source Image” is blank and also set the “Color” to be fully transparent (by default it is fully opaque).
Finally, select your original object (the one with the ScrollRect component), and drag/drop your Viewport object into the field “Viewport”.
Step 4: Enable Flexbox on the Scrollview contents
Create one final item, this time a child of your new Viewport object, and add:
- FlexContainer
- FlexItem
(Note: if you skipped adding a FlexContainer in Step3, then instead, here you only add:
- FlexContainer
…and you will have to manually size it to fit the size of the parent Viewport. If you added a FlexContainer in Step3, then this will happen automatically for you)
You can now configure the FlexContainer (set Column mode or Row mode), and the FlexItem (use Margins and/or Padding – only available in the full version of Flexbox), etc.
When the Flexbox UI takes up more space than the Viewport object, Unity’s scrollbars will kick-in and enable the user/player to scroll around your Flexbox UI.
Finally, select your original object (the one with the ScrollRect component), and drag/drop your Flexbox object into the field “Content”.