Unity has three different UI frameworks that run in parallel (IMGUI, UnityUI, and UIElements/UIToolkit). The latest of these is UIToolkit (identical to UIElements, but the marketing team renamed it), and it’s really very good – but most of the docs are missing or incorrect and that’s stopping people from adopting it.
This is my quickstart guide for people who write Editor UI / Editor scripts (custom Inspectors, custom EditorWindow instances, custom tools in the UnityEditor, assets for the asset-store, etc). It aims to get you up and running fast with UIToolkit (making better UIs, and in less time).
UIToolkit for Editor scripting: Assumptions
UIToolkit is not (currently) a replacement for UnityUI – it’s incapable of doing most of the things that UnityUI does. But nearly all of those things are only relevant when writing runtime / game UI; when we look at the narrower problem of “Editor scripting”, then UIToolkit is pretty much a drop-in replacement for UnityUI, better in almost every way.
When writing editor-scripts you almost never want to have replaceable CSS “style.css” files. There’s just no point – most of the time you want to use one fixed style/colourscheme that’s been carefully chosen to complement the UI design for your scripts/app/asset. You do want to use CSS itself – but CSS can happen inline, or in-document, or in OOP style – it doesn’t have to be a standalone file!
How to use UIToolkit
There are three ways to use UIToolkit:
- Option 1: write everything in one place (like with IMGUI)
- Option 2: write a separate style.css file(s) which renders your UI
- Option 3: split data between source, and style files, and XML (like with UnityUI, which is usually split between prefabs and gameobjects)
The few Unity docs often use options 2 and 3 together, which is a great way to demonstrate multiple features at once. 3rd party tutorials often use option 2 or 3 too, and ignore Option 1. But … Option 1 is the one that most developers need/want most of the time: it’s much quicker and easier to maintain. That’s what we’ll focus on here.
NEW! Confusing Concepts
The way Unity chose to implement UIToolkit is a little unusal (in Unity-land). However once you understand a few basics it suddenly makes a lot of sense and should become easy. I was suprised that most tutorials didn’t seem to explain these…
Concept 1: Everything is Flexbox
Everything in UIToolkit is laid-out using Flexbox. Flexbox – or, to give it it’s full name, “CSS Flexbox” – is the 2020’s-era layout system used by mainstream CSS (along with “CSS Grid”) . All other layout systems in HTML/CSS exist for backwards compatibility (CSS itself goes back 20 years … there’s a lot of websites out there that we still want to maintain and keep alive).
If you already know what Flexbox is and how to use it (e.g. because you’ve done some modern CSS3 coding before) … skip this section and go straight to “Concept 2”.
Flexbox is a delighfully simple and yet amazingly powerful layout system; it’s what the world’s leading browser vendors (and leading UX designers, programmers, etc, from the biggest internet companies) invented after decades of trying other layout approaches. It’s so good … that I ported it to UnityUI (which is what the rest of this website is about – if you’re doing in-game UI, I recommend UnityUI + Flexbox4Unity 😉 ).
The key point is that they realised you can use a very small set of simple rules and with that you can generate (almost) any layout you can think of. The “small” and “simple” mean that it’s much easier to plan + implement your UI, but also mean it’s much easier for someone (Unity, or a browser vendor) to write a stable, working, implementation. So … what’s in Flexbox?
- Everything is laid out EITHER in horizontal rows, OR in vertical columns
- Everything can be a container for other things (you can nest things inside each other indefinitely)
- Inside a row, or inside a column, behaves identically: once you know how rows work, you already know how columns work (and you can seamlessly flip a UI from being “mostly horizontal” to “mostly vertical” by changing a single variable.
- Within a row/column (or “Flex Container” which means: either) you define three things:
- The initial size of each item (by default: each item uses its “obvious” size so you normally don’t type anything here)
- If there’s spare space: how much this item will grow to fit
- If there’s too little space: how much this item will shrink to fit
- You can also flow/wrap your FlexContainer, so that e.g. a FlexContainer in row-mode can have multiple rows (like a book). Or a FlexContainer in column mode can have multiple columns (like a newspaper). NB: this enables you to make most kinds of grid – but not all, which is why CSS also has “CSS Grid”, to cover the missing cases.
- Each item also has Padding and Margin (inherited from core CSS).
- Every size can be specified as any of:
- A number of pixels (like in traditional Unity UI’s)
- A percentage of its parent (e.g. 50% = use half my available space)
- “exactly big enough to fit my contents and all my children” (super incredibly useful – this is the DEFAULT SIZE for all items if you don’t specify one)
- Relative to the font-size (useful for text-heavy parts of your UI)
- Relative to the screen-size (useful for resolution-independent UI. See an example of how I made a Unity UI that automatically works on iPhone, iPad, and Desktop all from one UI, like magic)
That’s (almost) everything – the entire layout system!
Concept 2: Everything in UIToolkit is a VisualElement
Because CSS defines everything on screen as coming from an HTML “element”, UIToolkit has a VisualElement baseclass for the whole UI.
Because in HTML/CSS anything can be nested inside anything else, UIToolkit’s VisualElement’s can always have child VisualElements too.
All of the classes in UIToolkit are built on top of VisualElement, so they share a lot of methods.
TL;DR: VisualElement is like “GameObject combined with Transform” in a single class: it handles the hierarchy through one class (much less typing). You subclass it to do the rendering (imagine GameObjects where each one can only ever have one MonoBehaviour. Much simpler!)
Concept 3: the letter Q
For (good) reasons: UIToolkit is a query-based UI system (briefly: you manipulate an abstract model of the UI, which enables Unity to do a lot of performance optimization at render time). This means you very frequently call a method “Query”, and for convenience Unity made a shorthand version called, simply: “Q”:
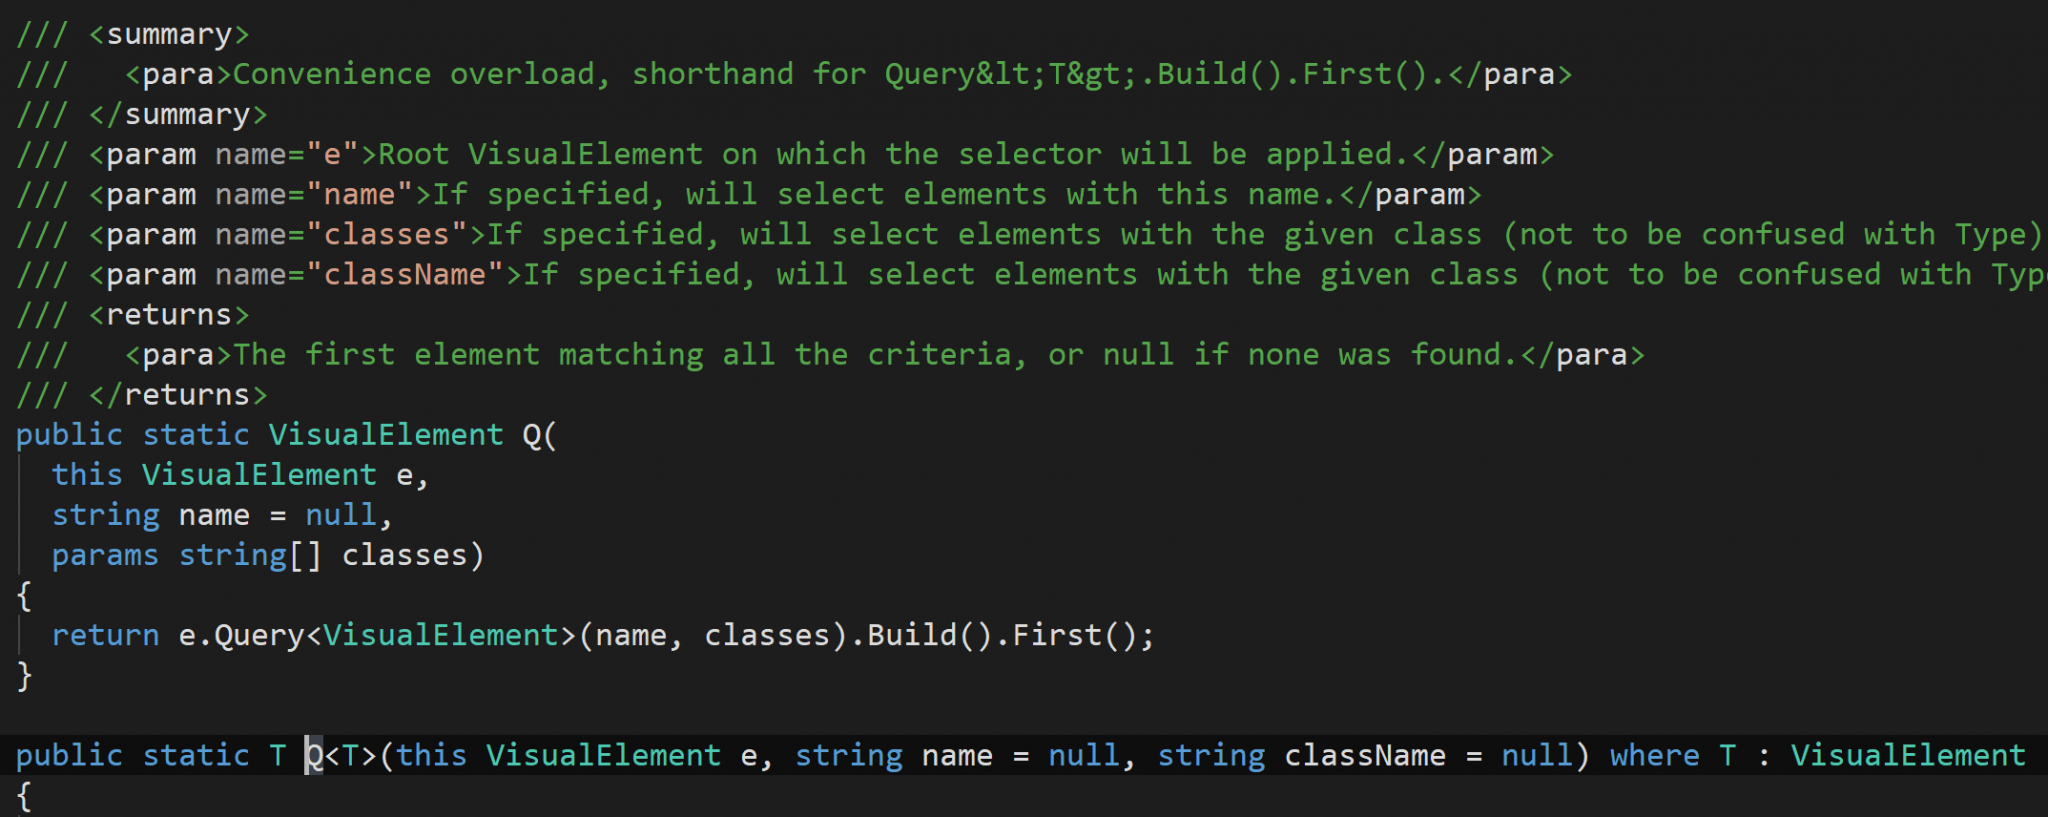
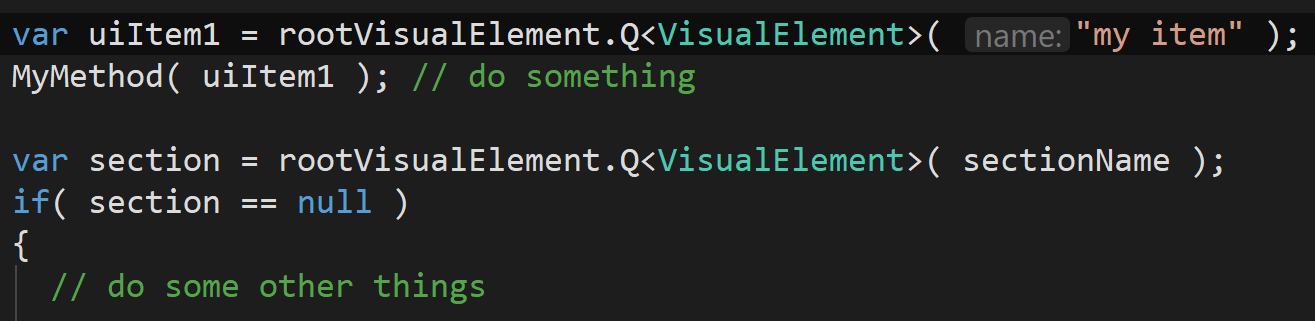
…which means you will see a LOT of code that looks like this:
Concept 4: There’s a new Event System
This one hurts me a little: Unity has invented yet another proprietary event system to go with their new (mostly) standards-compliant UI System. I have only scratched the surface of this system so far – I will provide super-simple examples for common actions – but there’s a lot of power hiding here, and some heavy reading in the Unity docs if you’re into this kind of thing…
Concept 5: You can’t just write UI, it has to be embedded in something
Inherited from CSS is the idea that you don’t just “display” something, you embed it inside something else (remember that VisualElement’s can be nested infinitely inside each other), and the outermost / topmost thing you embed in roughly equates to “the screen” (But could also be “the app-window” or even “a sub-panel within a different UI”). CSS doesn’t care, makes all those things behave the same as far as you’re concerned.
This is one of the great benefits of CSS / UIToolkit: once you’ve written your UI it’s trivial to embed that UI inside a different UI – unlike all previous UI systems in Unity where embedding required a lot of extra work.
Net effect: when you want to start writing code to build a UI you need to find a reference to the “outermost VisualElement”. Unity classes that support UIToolkit have mostly been extended to have a built-in property:
Debug.Log( rootVisualElement ); // the Unity class provides this..once you have your root VisualElement you can start “adding” other VisualElements to it, causing them to appear in your UI.
Next … Code Samples
Part 2 is now available here: UIToolkit for EditorWindows and Custom Inspectors
If you find these tutorials useful then you could thank me by:
- Sharing them with other people
- For your UnityUI code: trying out Flexbox4Unity (mostly useful for using these same techniques to make in-game UI, which UIToolkit does very badly at the moment)