Documentation: customizing autosizing, understanding autosizing
Do you hate using Unity’s ContentSizeFitter component, that thing that so often fails to do the one task it was created for, and is incompatible with so many other parts of Unity’s Layout system? One of the original reasons I created Flexbox4Unity was the pure frustration I felt at ContentSizeFitter breaking yet again, and ruining yet another game-UI project, more than 4 years after Unity declared it “production ready”.
Unity’s Editor is really bad (about 30 years behind the standard in UI-editors!) when it comes to creating and editing UI. With Flexbox we can do a lot better – but it helps to know what Flexbox is doing behind the scenes, and how it is automatically helping you, so that you can take maximum advantage of it.
Default Unity: Not good
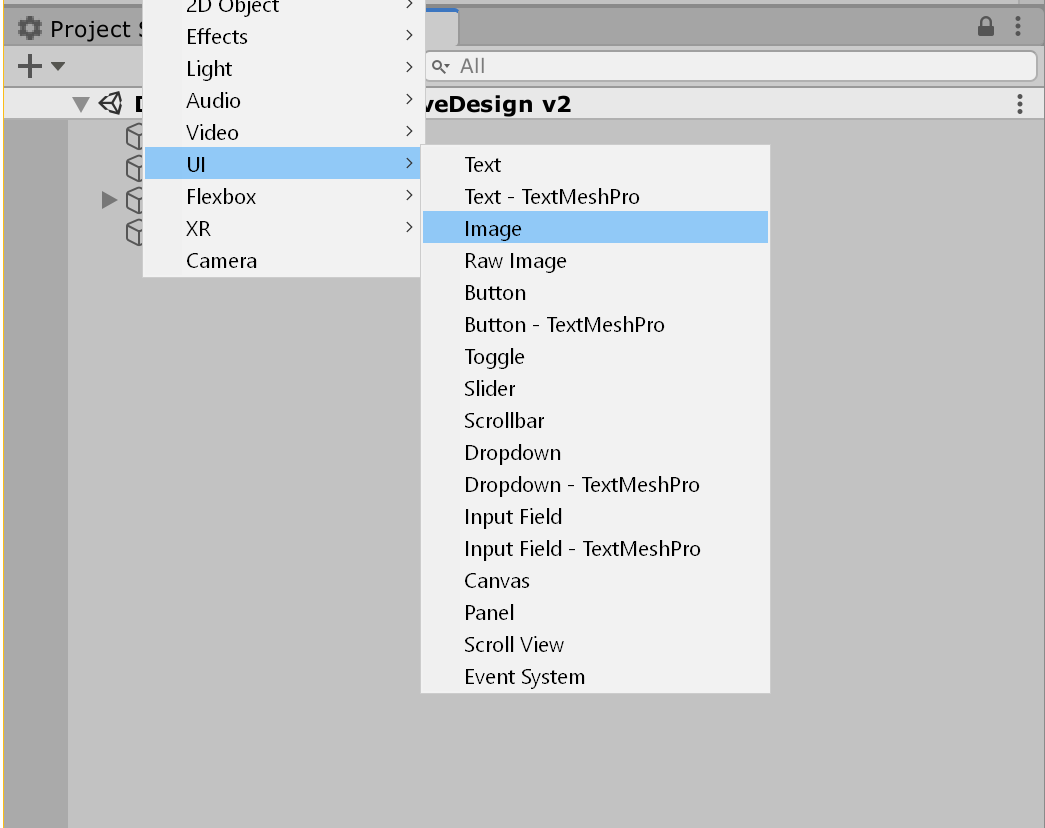
What happens in Unity when you create a new UI? Something like this:
Well, Unity does the most annoying thing it can and gives you a blank white square of default (hardcoded!) size:
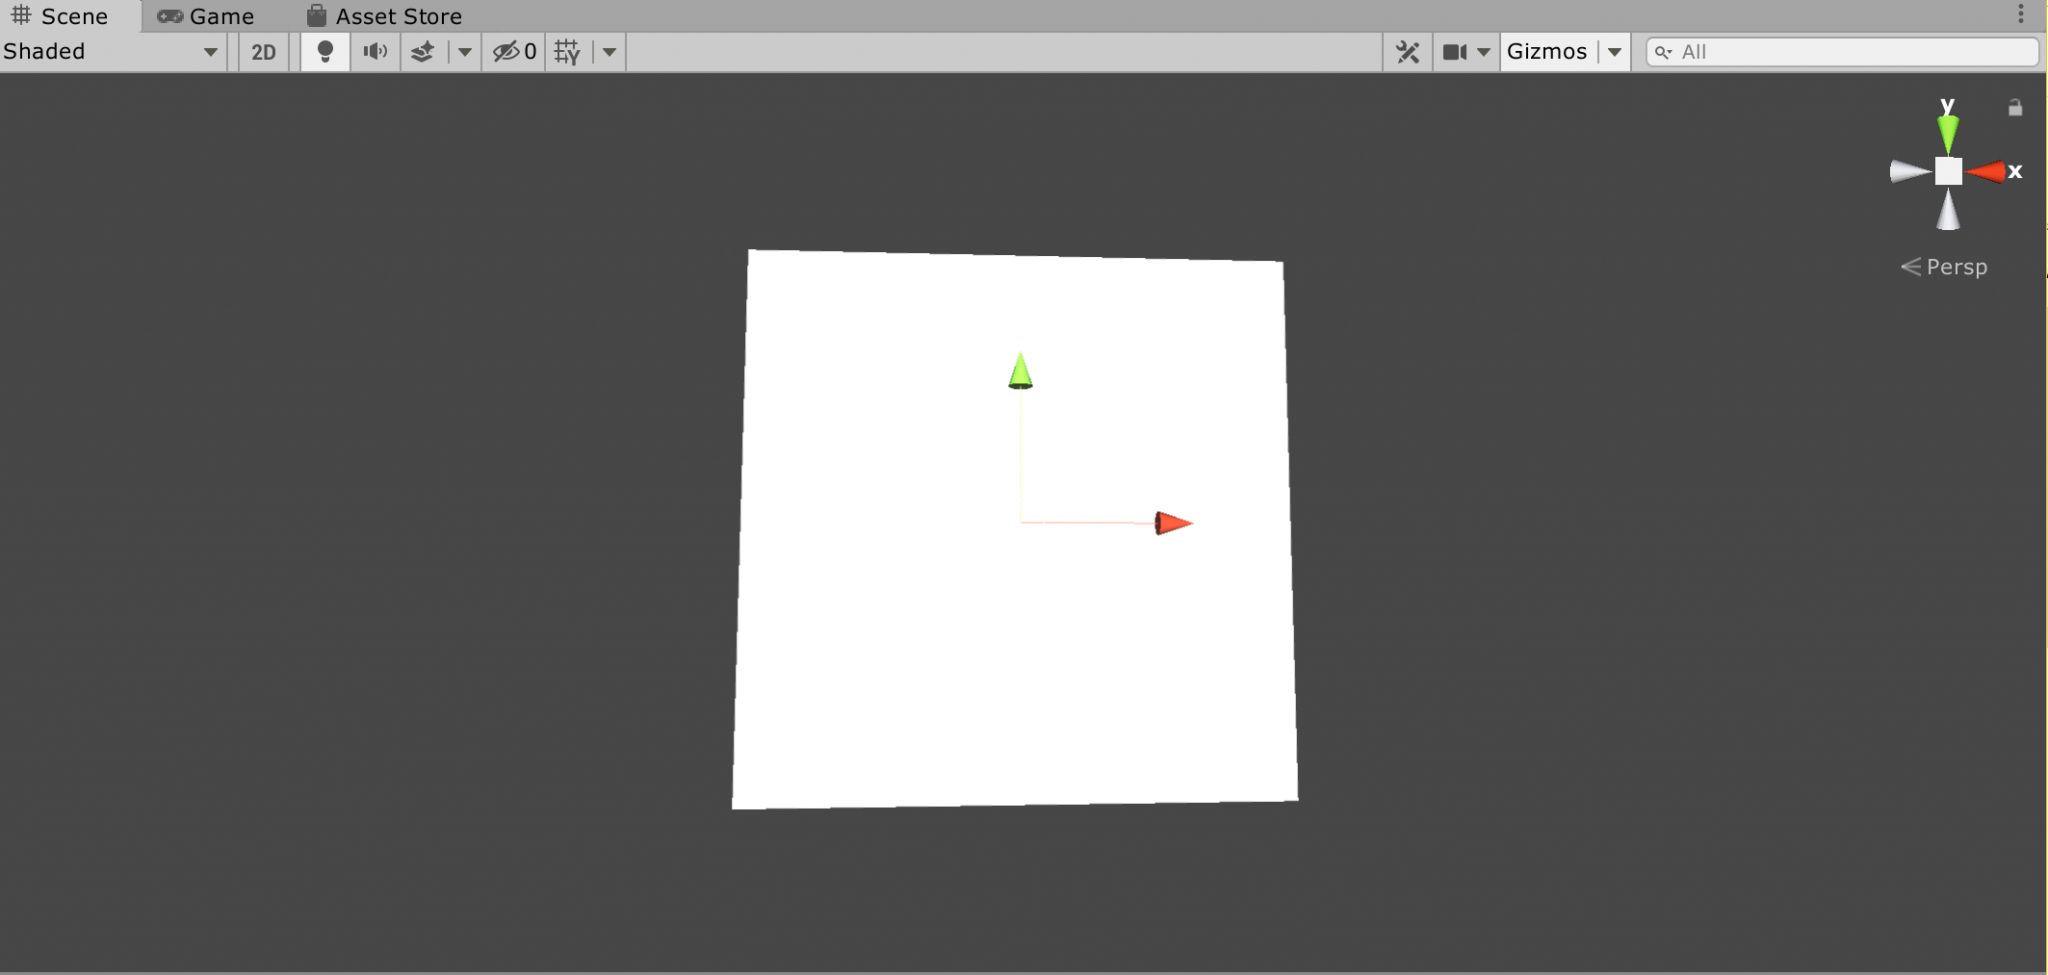
Unity’s editor contains a lot less intelligence than you might expect – if you want that white square to be the size of the image (which in almost all cases is, indeed, what you want) you have to jump through hoops to make it do so. And those hoops often fail (see my complaints about ContentSizeFitter above).
Flexbox for the win
The original Flexbox specification (part of the CSS specification) states that all browsers must automatically size the content wherever possible (it was designed for web browsers originally, and for laying out GUI in webpages – but we’re using it in Unity3D). What does that mean in Unity?
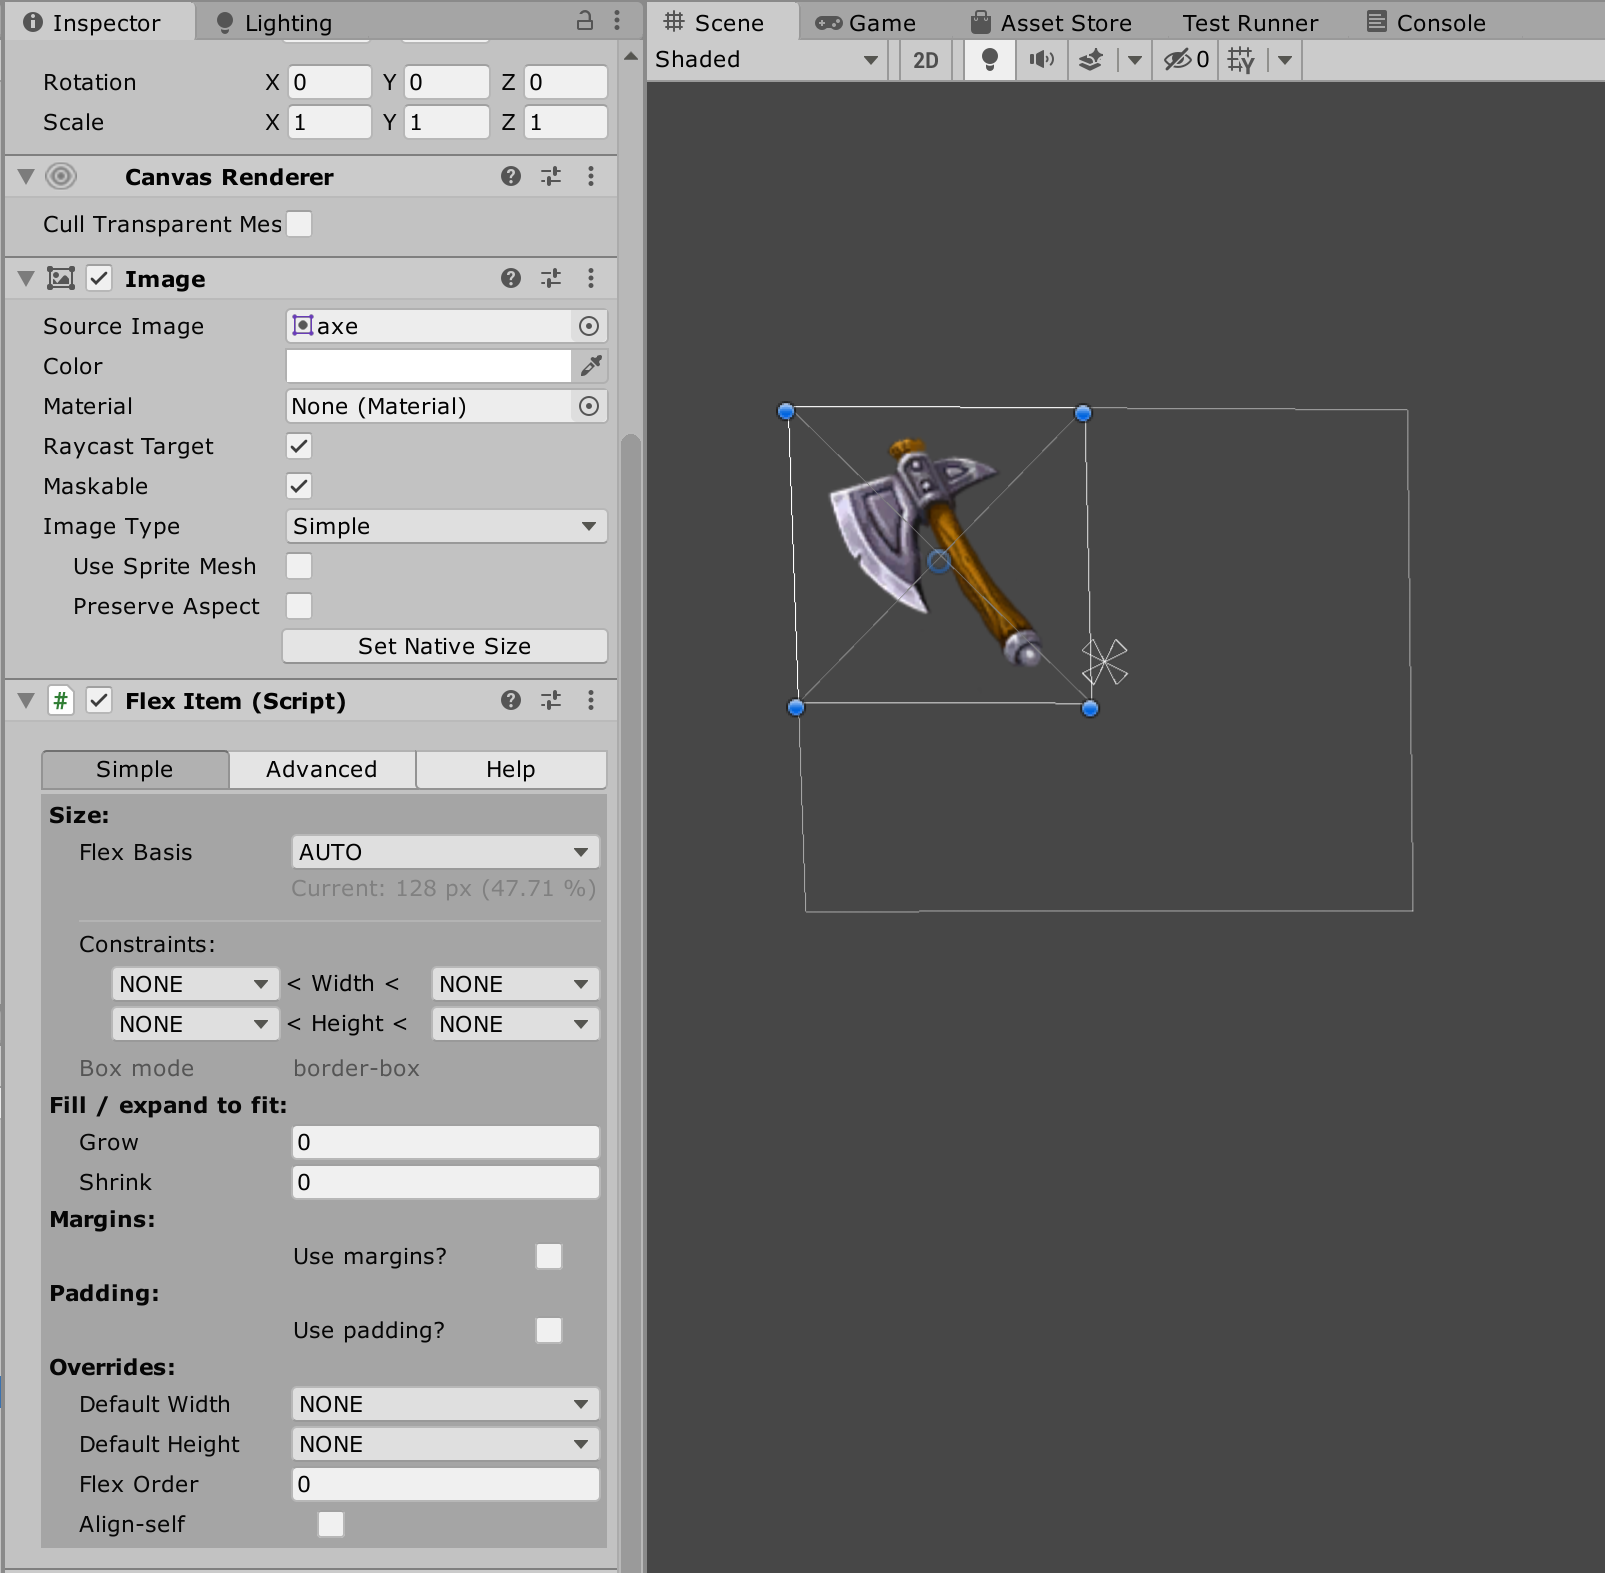
To auto-size that Unity Image above, all you have to do is assign a texture and add it to a Flexbox layout (using Flexbox4Unity) and … automatically it will resize itself to be the correct pixel-perfect size. You can assign the texture first, or add it to the layout first, both ways it will end up the correct size (Unity’s own UI library fails to do this, sigh).
(Note: by default, FlexItems are set to ‘expand to fill all space’, and FlexContainers are set to STRETCH their children. So … if you’re creating a default layout with default settings then you’ll need to select the Image’s FlexItem component and set the Flexbox ‘grow’ value to ‘0’ … and change the parent container’s ‘align items’ setting to START, END, or CENTER. That will let the image keep its original size)
In fact … any UI component you create or add to a Flexbox4Unity layout will automatically resize itself, no matter what the situation (the default flex-setting for all new items is “AUTO” or “CONTENT”, both of which mean “use the automatic size of the thing itself”).
How is this happening?
Inside Flexbox4Unity: Auto-sizing of UI items
How does Flexbox autosize my components, and what can I do to make sure it gets it right?
As of January 2021, the latest build (anything using LayoutAlgorithm-v3.x or newer) does this:
- Is the UI item a UnityText or TextMeshPro? — if so, use the text’s own natural size
- Is it a Unity Button? — use the Button’s default size
- Is it a Unity Toggle? — Toggle’s default size
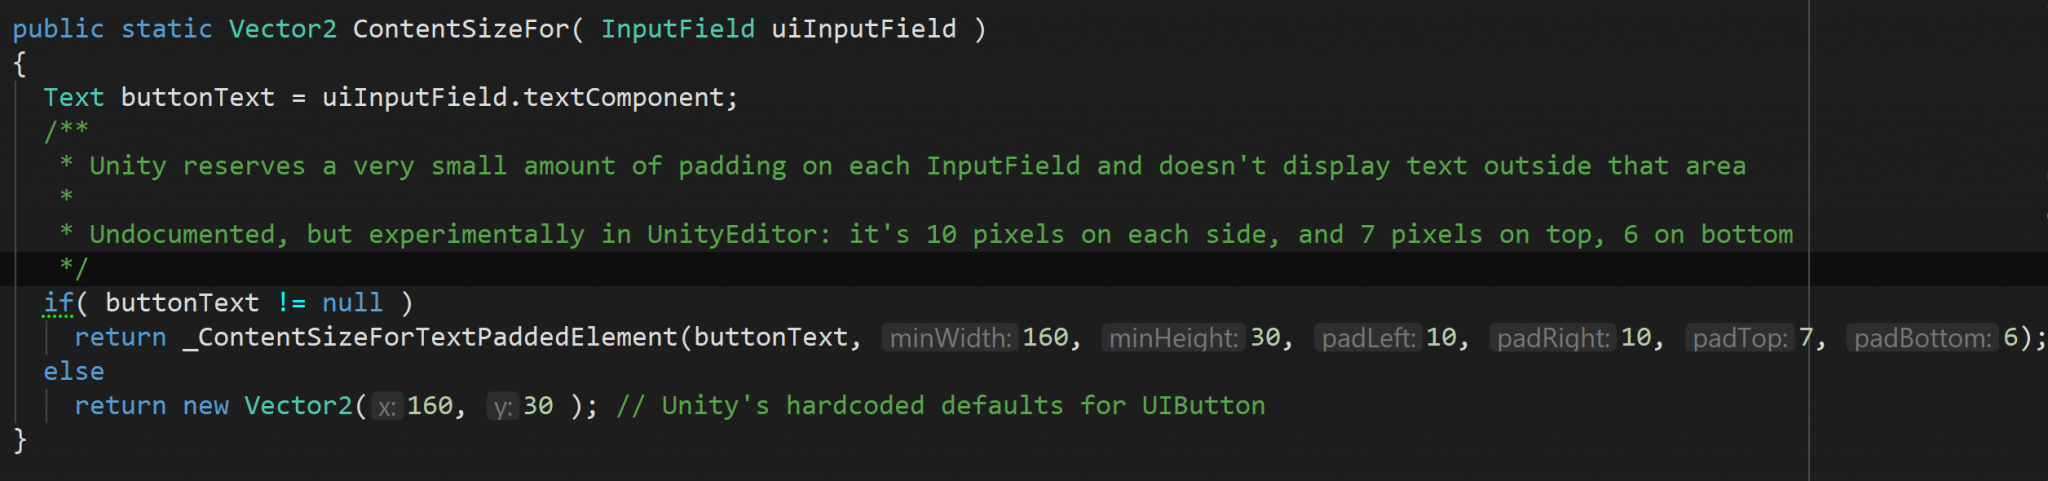
- Is it a Unity InputField? — InputField’s default size
- But … if it’s an Image or RawImage: use the original size of the image/texture in pixels
…but what if it’s none of those? What if you embedded the UnityUI component as a child GameObject?
The algorithm now repeats steps 1..5 on all the child components until it finds a match. e.g. If it finds a grandchild Button it will use that before checking for a child or grandchild Image.
- NB: it has to do all non-images first because e.g. a Unity Button actually contains an embedded Image, and it would get the wrong answer.
Finally it searches for any custom or 3rd-party UI components, by looking for subclasses of “ILayoutElement.cs”. By definition all UI components should be subclassing that directly or indirectly.
- NB: A fatal bug in Unity’s own design of UnityUI means that some components don’t extend ILayoutElement, and that sometimes it matches the wrong thing. As of Dec 2020 it is optional in source code whether to do this step at all, because it was causing problems with some 3rd party code. You can re-enable it by commenting out the “#define AUTOSIZED_CALC_IGNORE_CUSTOM_ATTACHED_ELEMENTS”
Customizing it / How does it work internally?
What follows is for people looking to customize or replace the auto-sizing behaviour with their own. This requires customizing either a single LayoutAlgorithm or changing all LayoutAlgorithms by editing the shared code.
Internally:
- The LayoutAlgorithm that you’re using (auto-created for you, or configurable by hand in the ProjectSettings) contains a method that tries to intelligently guess which GameObject (current or child or grandchild etc) to use for auto-sizing
- When it finds a UnityUI / official Unity component, it uses a shared class (ContentSizeCalculators.cs) to provide the correct size for that specific Unity component.
- When it cannot find an official Unity component, it instead looks for fallback-options – including searching for your custom or 3rd party components and autosizing them from their own data.
The goal here is that it’s very easy for me (or you!) to edit the shared class (ContentSizeCalculators.cs) if/when Unity changes their definition of the sizes of their custom components, and that will immediately fix all of the different re-usable LayoutAlgorithms in your project.
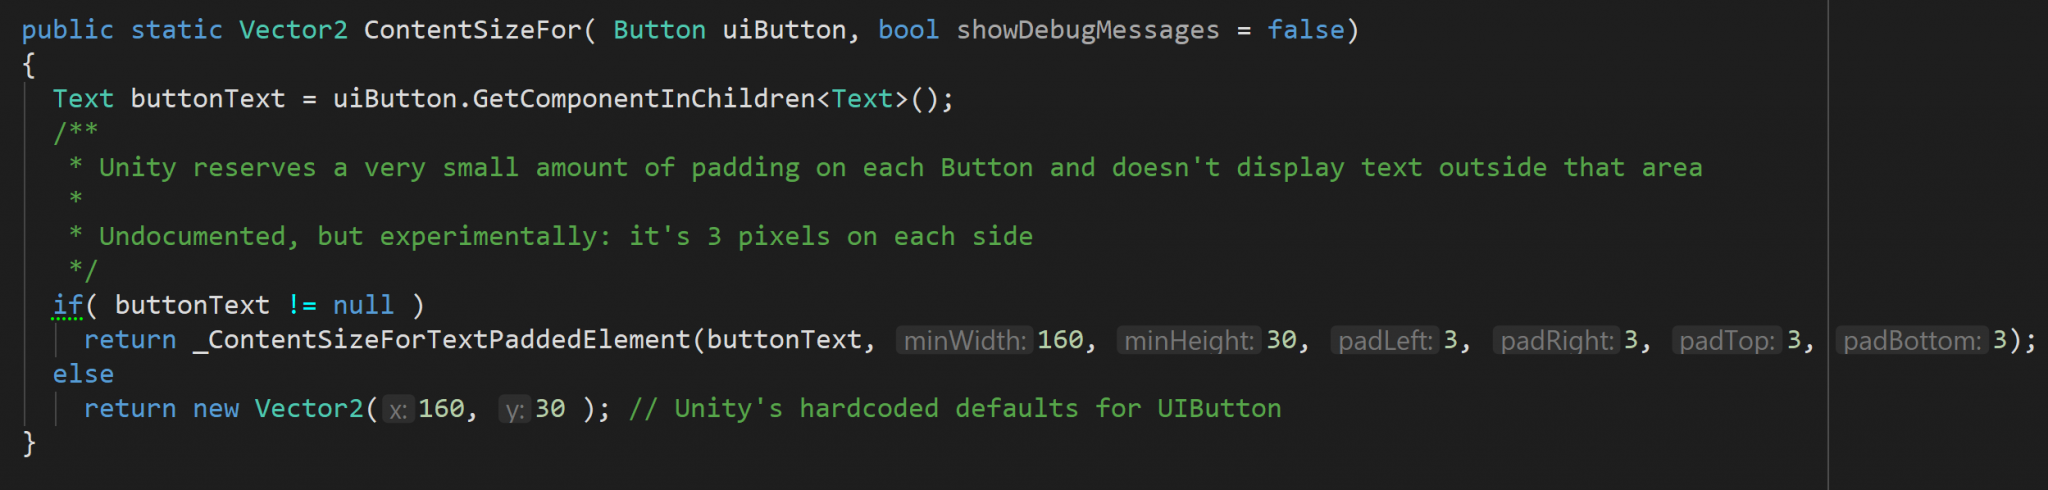
For example … although this isn’t documented anywhere by Unity, all Unity Buttons have an initial default size of 160×30 pixels, and have 3 pixels of padding around the sides. My class automatically calculates this for you, for all Buttons:
Or … how big is a UnityIO InputField component, in pixels? Well, it’s not documented, and it’s different amounts on each side – very easy to get wrong! – but here I’ve encoded it: